A refrigerator thermistor is nothing more than a resistor whose value changes with temperature. The control board sends a small current through it, reads the resulting voltage, and from that works out how cold the compartment is. It is how a modern fridge 'knows' its own temperature, and it is a very common point of failure.
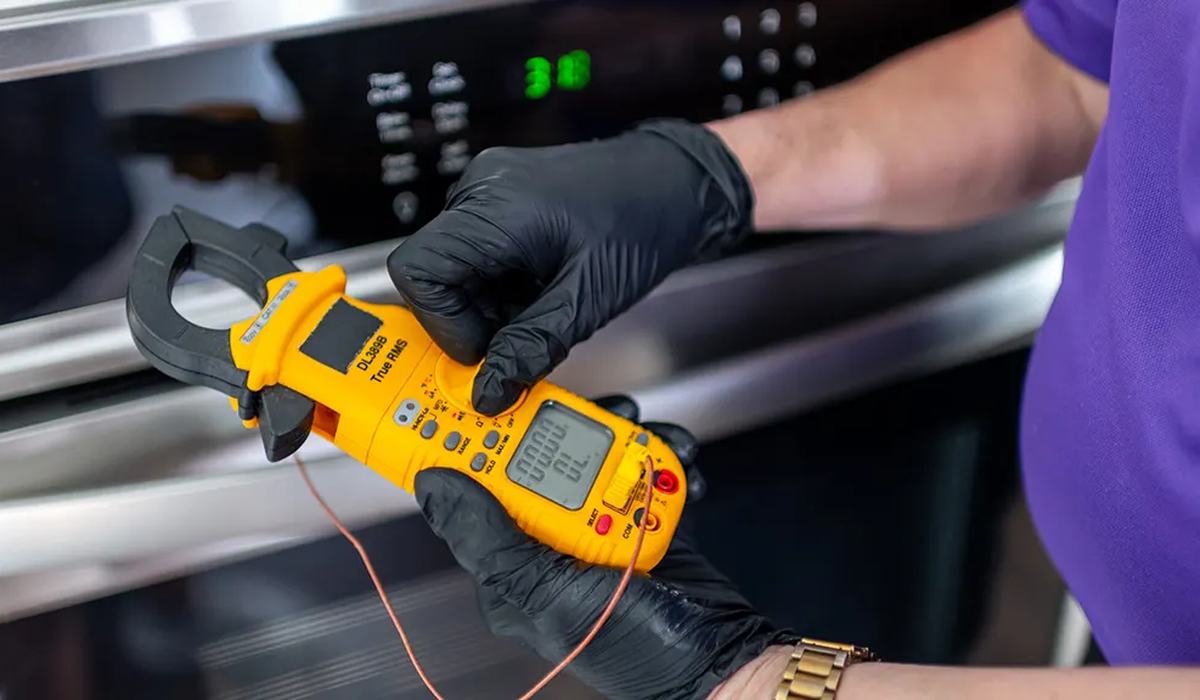
Testing one takes a multimeter, ten minutes and no special knowledge — and the result tells you whether to replace a cheap sensor or investigate the board.
- The fridge runs constantly and never seems to shut off, or freezes everything.
- The fridge is warm while the freezer is normal, or vice versa.
- The display shows an error code, or a temperature that clearly does not match reality.
- The compressor short-cycles — on and off every few minutes.
- Food near the back freezes while the front stays warm.
- An intermittent fault that comes and goes with temperature.
On this page
What a thermistor does
- It is a resistor that changes resistance as temperature changes — usually decreasing as it warms.
- Most appliance thermistors are the NTC type: resistance falls as temperature rises.
- The control board reads it as a voltage and converts it into a temperature.
- Because it is a plain resistor, it can be measured directly with a multimeter.
- A thermistor can fail by going open, by shorting, or by drifting out of spec — a drift is the hardest to spot and the most common in practice.
- Unlike a thermal fuse it does not fail safe; it fails gradually, and the fridge behaves oddly rather than stopping.
Where to find it
| Location | Typical appearance | Notes |
|---|---|---|
| Inside the fridge compartment | Small plastic-clipped probe on the back or side wall | Most common |
| Inside the freezer | Probe behind a cover panel | Often the defrost sensor |
| On the evaporator coil | Clip-on or push-in probe | Reads coil temperature |
| Behind the control housing | Small two-wire connector | Sometimes the ambient sensor |
| In the air duct | Inline probe | Reads the airflow temperature |
Look for a small two-wire connector with a plastic-tipped probe. On most models it unclips from the wall or sits behind a small cover, and it is deliberately accessible because it is a service part.
Always unplug the refrigerator before removing a thermistor or disconnecting it. The measurement itself is done on an unplugged appliance, and the sensor connector sits close to live control wiring.
How to test it
- Unplug the refrigerator. Locate the thermistor and disconnect its connector.
- Set the multimeter to the resistance range — typically 20k ohms or an auto range.
- Measure across the two thermistor terminals at room temperature. Write the value down.
- Note the ambient temperature at the same moment. It matters for interpreting the next measurement.
- Cool the thermistor — place it in a sealed bag in ice water, or in the freezer, for a few minutes.
- Measure again while it is cold. The resistance should change significantly — usually rising as it cools, for an NTC type.
- Warm it back up in your hand and measure a third time; it should move back toward the original reading.
- Compare with the temperature/resistance chart for your model if you can find one.
Reading the result
| Behaviour | Interpretation | Action |
|---|---|---|
| Resistance changes smoothly cold to warm | Thermistor is working | Look elsewhere for the fault |
| Infinite reading (OL) at all temperatures | Open circuit | Replace the thermistor |
| Zero or near-zero reading | Shorted | Replace the thermistor |
| Resistance changes very little | Failed or highly drifted | Replace the thermistor |
| Value wildly off the chart for its temperature | Drifted out of spec | Replace the thermistor |
| Correct at room temp, wrong when cold | Temperature-dependent failure | Replace the thermistor |
The single most important test is the change, not the absolute number. A thermistor that reads a plausible 10k ohms at room temperature but barely moves when chilled has failed, even though its resting value looks normal. Manufacturers publish a resistance-to-temperature table for each model, but you rarely need it: a working NTC thermistor changes by thousands of ohms over a 40°F range.
If you cannot easily chill the thermistor, warm it instead. A hair dryer at arm's length for thirty seconds will change the reading dramatically on a working unit and not at all on a failed one. Keep the heat gentle and moving — you are warming the sensor, not cooking it.
Replacing it
- Buy by model number, not by appearance. Thermistor curves differ and a mismatched sensor gives wrong temperatures.
- Unplug the fridge and photograph the connector before removing.
- Unclip the probe from its mount; most are push-fit or held by a single screw.
- Route the new probe exactly as the old one was routed. Position against a wall changes the reading.
- Reconnect and power up, then let the fridge stabilise — four to six hours.
- Verify with a thermometer that the compartment now reaches target temperature.
- If the fault persists with a new sensor, the control board is the next suspect.
When the trace is fine but the fridge is not
If the thermistor tests good and the fridge still misbehaves, the sensor was not the fault. The next candidates, in order, are:
- Connector corrosion or a loose pin at the thermistor — check for clean metal and a firm click.
- Wiring damage between the sensor and the board, often where the harness passes a hinge or a sharp edge.
- A failed main control board, which is the common outcome when the sensor and wiring test clean.
- A defrost system fault, if the symptom is icing rather than temperature.
- A sealed-system fault, if the compressor runs constantly and the compartments are both warm.
A refrigerator thermistor test needs only a multimeter and a way to change its temperature. If the resistance moves smoothly from cold to warm, the sensor is fine and you look at the wiring or the board. If it is open, shorted or barely moves, replace it — and remember a drifted sensor looks normal at room temperature.