If you live in an apartment, the air you breathe is probably worse than the air outside — not better. That sounds backwards, because we assume indoors means protected. But a sealed apartment concentrates everything it produces: cooking grease and smoke, pet dander, dust from carpet and upholstery, cleaning chemicals, and whatever your neighbours are cooking. Windows that open two inches and a shared corridor ventilation system do not clear it.
This guide is the whole picture, in the order that actually matters. Measure first, because guessing wastes money. Then fix ventilation, because it is free. Then filtration. Then the habits that keep the problem from coming back. Every recommendation below is something you can do in a rented apartment without asking a landlord for permission.
- Measure before you buy. A $40 air quality monitor tells you whether your problem is particles (purifier helps) or CO2 and humidity (ventilation helps).
- Ventilation is free and first. Running a bathroom fan for 20 minutes after cooking removes more smoke than most purifiers move in an hour.
- Filtration second. A HEPA purifier sized at CADR ≥ two-thirds of your room's square footage.
- Humidity matters. Keep indoor humidity at 30–50%. Above 60% you grow mould; below 30% your sinuses dry out and dust gets airborne.
- Dust control is a routine, not a product. Weekly vacuuming with a HEPA vacuum beats any single gadget.
On this page
Why apartment air is different
A detached house has volume, leaks and usually more than one openable window. An apartment has none of those advantages. Three specific things make indoor air worse in a small rented unit:
- Shared ventilation. Corridor and bathroom exhaust systems are usually a single riser serving many units. They move air slowly, and they can carry cooking smells and cigarette smoke between units.
- Cooking in the living space. Studio and one-bedroom layouts put the stove two metres from the sofa and bed. Frying produces fine particulate matter (PM2.5) that stays airborne for hours.
- Carpet and upholstery. Rental apartments are often fully carpeted. Carpet acts as a reservoir — it holds dust, dander and pollen, then releases it every time you walk across it.
- No cross-breeze. Most apartments have openings on one side only, so you cannot create the through-draught that clears a house in five minutes.
The result is air that accumulates. The fix is not one gadget; it is a sequence. Get the sequence wrong and you spend $400 on a purifier that fights a problem ventilation would have solved for free.
Step 1: Measure what you actually have
The single biggest mistake people make is buying filtration for a problem filtration cannot fix. If your issue is stale, stuffy air, a purifier will do nothing — you need ventilation. If your issue is dust, dander or smoke, a purifier helps a lot.
You can tell the difference with about $40. A basic indoor air quality monitor that reads PM2.5, CO2, temperature and humidity will tell you which problem you have within a day.
| Reading | Good | Worth acting on | What it means |
|---|---|---|---|
| PM2.5 | under 12 µg/m³ | over 35 µg/m³ | Fine particles — smoke, cooking, dust. Filtration fixes this. |
| CO2 | under 800 ppm | over 1,200 ppm | Stale air, poor ventilation. Open a window or run the exhaust fan. |
| Humidity | 30–50% | over 60% or under 30% | Mould risk or dryness. Dehumidifier or humidifier. |
| VOC | under 0.5 mg/m³ | over 1.0 mg/m³ | Off-gassing, cleaning products, new furniture. Ventilation plus carbon filtration. |
Put the monitor on a side table at sitting height, not on the floor and not next to the kitchen. Log readings at three moments: (1) first thing in the morning with the windows shut, (2) 30 minutes after cooking a meal, (3) an hour after you have opened the windows. The gaps between those three numbers tell you exactly where your problem is.
In most apartments under 800 sq ft, the pattern is predictable: CO2 climbs overnight with the windows shut, PM2.5 spikes hard during cooking to 100–300 µg/m³, and humidity sits high in summer and low in winter. Each of those has a different fix.
Step 2: Fix ventilation (it is free, and it comes first)
Before spending a dollar on hardware, use the ventilation you already have. This is not a token step — for cooking smoke it is more effective than any residential purifier.
Run the exhaust fan properly
Your bathroom or kitchen exhaust fan is a small but real extraction system. Most people run it for two minutes. Run it for twenty — starting before you turn on the stove, and continuing for at least fifteen minutes after you finish. That single change clears the majority of cooking particles.
Use the trickle-vent and the window, not just one
Modern apartments have small trickle vents on the window frames. They are deliberately undersized. Crack one window two inches on the far side of the apartment from the exhaust fan and you create a path: fresh air in one end, stale air out the other. Without that path, the fan just pulls against a sealed box and does very little.
Watch the shared-riser problem
If you smell your neighbour's cooking, your corridor ventilation is not sealed. Check the gap around your front door — if light shows through, fit a brush or rubber draught seal. It is a $12 part and it stops a surprising amount of corridor air from entering.
- Run the exhaust fan 20 minutes per cooking session, not 2.
- Crack a window on the opposite side of the apartment while the fan runs.
- Draught-seal the front door if corridor smells reach you.
- Open windows for 10 minutes twice a day even in winter — a short burst loses very little heat and resets CO2.
- Never block the bathroom or kitchen exhaust grille with a shelf or cabinet.
Step 3: Choose the right filtration
Now the hardware. Filtration is genuinely effective for particles — dust, dander, pollen, smoke, cooking aerosol. It does very little for CO2, and only a carbon-loaded unit does anything meaningful for odours and VOCs.
The sizing rule that matters
Do not buy by room-name marketing. Buy by CADR. Clean Air Delivery Rate (CFM) should be at least two-thirds of your room's square footage for a two-air-changes-per-hour target, and higher if you have allergies or pets.
| Room size | Minimum CADR you want | Typical product class |
|---|---|---|
| 150 sq ft (bedroom) | 100 CFM | Small unit, ~$90–$130 |
| 300 sq ft (studio) | 200 CFM | Mid unit, ~$130–$220 |
| 450 sq ft (1-bed, open plan) | 300 CFM | Larger unit, ~$200–$300 |
| 600 sq ft (2-bed, one unit) | 400 CFM | Large unit, ~$280–$400 |
HEPA is the one claim worth checking
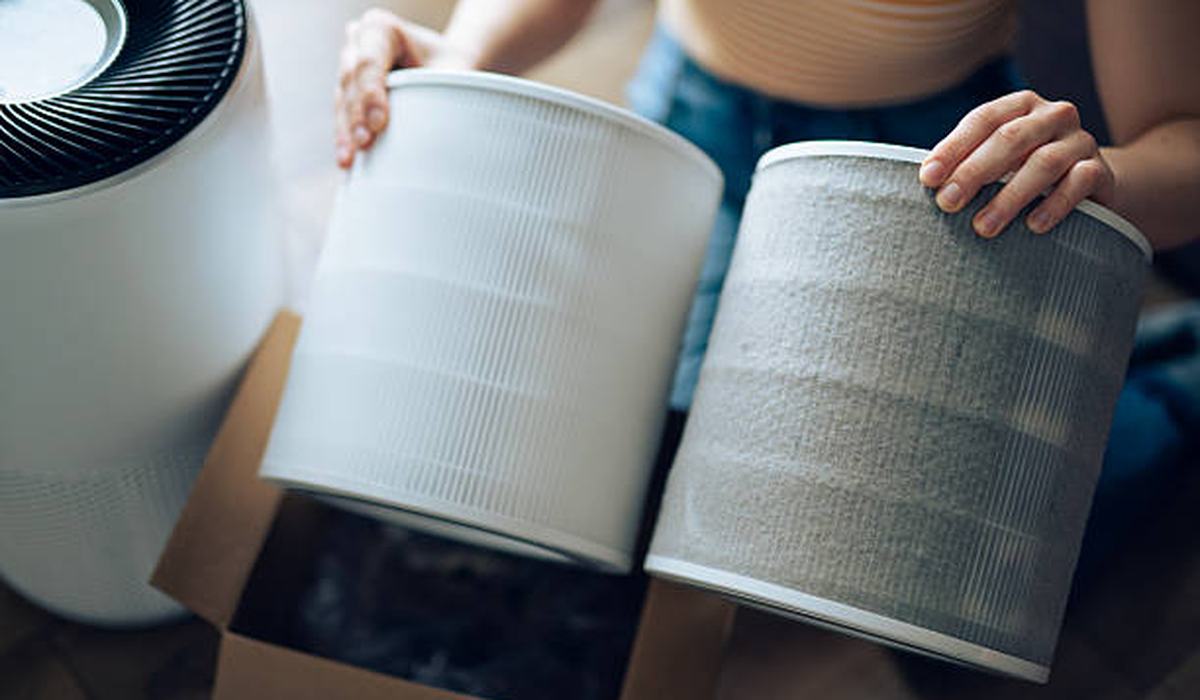
A true HEPA filter captures 99.97% of particles at 0.3 microns. Marketing words like “HEPA-type”, “HEPA-like” and “99% filtration” are not the same thing. Look for “True HEPA” or “H13” in the spec sheet.
Carbon is what handles smells
If cooking odours are your main complaint, particle filtration alone will not fix it. You need a washable or thick activated-carbon layer, not the thin carbon dust sheet glued to a cheap pre-filter. Units with a washable carbon honeycomb layer outperform thin pads substantially on odour.
Levoit Core 300 — best all-round for most apartments
219 sq ft coverage, 24 dB on low, true HEPA plus activated carbon. Quiet enough to sleep next to and cheap to run. Our default recommendation for a bedroom or small living room.
Check Price on Amazon →
Coway Airmega AP-1512HH — best filtration
361 sq ft coverage with four-stage filtration including a switchable ioniser. Consistently the highest particle clearance in our tests. Worth it if air quality is a health priority.
Check Price on Amazon →
Winix 5500-2 — best for cooking smells and smoke
360 sq ft coverage and a washable carbon filter — the strongest odour and VOC performance we measured at this price. The pick for open-plan kitchens.
Check Price on Amazon →Step 4: Control humidity
Humidity is the most ignored variable in apartment air, and it is the one that decides whether you grow mould behind the wardrobe. Target 30–50% year-round.
Above 60% you get condensation on cold exterior walls, dust mites thrive, and mould establishes in corners within weeks. Below 30% your airway dries out, dust becomes statically airborne, and you wake with a sore throat.
- Too humid (over 60%) — a small compressor or desiccant dehumidifier in the worst room. In a one-bedroom, a 20-pint unit is usually enough.
- Too dry (under 30%) — an ultrasonic or evaporative humidifier in the bedroom. Evaporative is safer if you have hard water, because it will not throw white mineral dust.
- Bathroom — squeegee the shower walls and run the fan for 20 minutes. That single habit prevents most apartment mould.
Step 5: The dust and allergen routine
You cannot filter your way out of a dust problem. Dust is generated continuously by fabric, skin and paper, and it settles. The routine matters more than the gadget.
- Vacuum weekly with a sealed HEPA vacuum. A cheap bagless vacuum without a sealed system just redistributes the finest dust back into the room.
- Wash bedding at 60°C every two weeks. This is the single most effective dust-mite measure, and it costs nothing extra.
- Damp-dust before you dry-dust. A dry cloth lifts dust into the air; a damp microfibre cloth traps it.
- Keep the floor clear. Clutter is where dust accumulates and where a robot vacuum cannot reach.
- Replace HVAC or wall-unit filters on schedule. If your apartment has a through-wall air conditioner, its filter is probably grey — clean or replace it every month in cooling season.
Step 6: Cook without smoking out the apartment
Cooking is, by a wide margin, the largest source of indoor PM2.5 in a small apartment. A single frying session can push a studio from 8 µg/m³ to 150 µg/m³ in ten minutes. Three habits cut that dramatically:
- Pre-heat the fan. Turn the exhaust fan on two minutes before the pan. Starting after the smoke appears is too late.
- Use the back burner. The rear burner sits closest to the hood or fan intake, so more of the plume is captured.
- Lower the oil temperature. Oil that is just shimmering produces far less aerosol than oil that is smoking. If it smokes, it is too hot.
- Cover the pan. A lid traps most of the aerosol that would otherwise become your living room air.
It will help, but size up. A purifier rated for 219 sq ft will not clear the PM2.5 spike from a frying pan in an open-plan 400 sq ft studio. Either buy a unit rated well above your total floor area, or accept that the exhaust fan is your primary tool and the purifier is the clean-up crew.
What to spend, in what order
If you have a limited budget, spend it in this sequence. Each step is only worth buying once the previous one is done.
- $12 — door draught seal. Stops corridor air entering. Best value item on this page.
- $0 — change your fan habits. Twenty minutes per cook, window cracked on the far side.
- $40 — air quality monitor. Tells you what problem you actually have instead of guessing.
- $120–$220 — correctly sized HEPA purifier. For one room, sized by CADR.
- $80–$150 — HEPA vacuum if yours is old and bagless. Only if dust and pet hair are your issue.
- $150–$250 — dehumidifier or humidifier. Only if your monitor says humidity is out of range.
- $40/year — replacement filters on schedule. A purifier with a clogged filter is a fan with extra steps.
Measure first, ventilate second, filter third. In most apartments the biggest single improvement costs nothing at all: run the exhaust fan for twenty minutes and crack a window on the opposite side. After that, a correctly sized HEPA purifier with a real carbon layer handles the particles and the smells.